
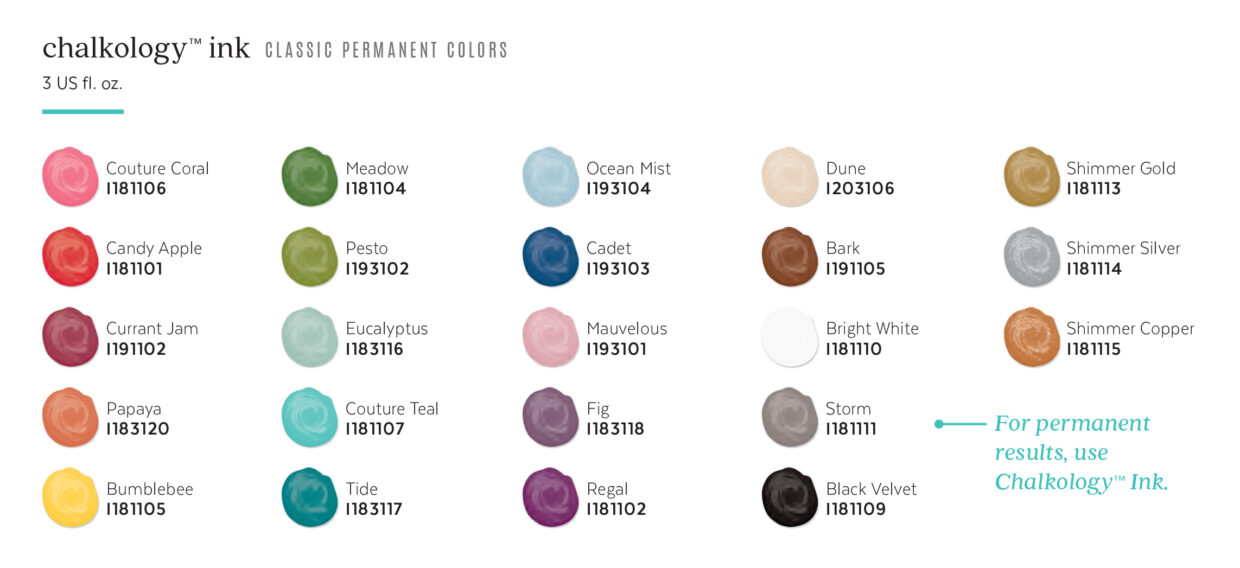
Chalkology Inks were designed for projects that you wish to be more permanent, but you do have to follow ink tips for successful heat setting to make it last the test of time on fabric or other materials. With over 24 ink colors to choose from, it’s hard not to want to create projects that will stick around for awhile.
Make your masterpiece last by heat setting your Chalkology Ink project after creating your design. Heat activates the pigments, bonding them to your surface.
Table of Contents
Why do I need to heat set your project?
If you don’t follow these ink tips to heat set your project, your fabric pillow case or shirt will not stand up to a run through the washing machine. Additionally, your mug or decorative plate may not hold up well to a hand wash at your kitchen sink. Heat setting your ink projects ensures that your fabric projects can be gently laundered and that your mugs or bowls can be gently washed.
3 Ink Tips to Heat Set Your Ink Project on Fabric
- Heat set fabric with medium iron, using parchment paper as a barrier.
- Iron for a minimum of 4 minutes per side.
- Move the iron in small circular motions across the design.
PRO TIP: Don’t forget the parchment paper. Use in between the fabric surface and your iron.
3 Ink Tips to Heat Set Your Ink Project on Other Surfaces
- Heat set oven-tolerant surfaces (the “non-food” side of surfaces like mugs, bowls, etc.) by placing them in the oven, preheated to 350°F, for 30 minutes.
- After 30 minutes, turn the oven off and let the item cool inside the oven.
- NOTE: Chalkology Ink (or Paste) is not food safe.
More Chalk Couture Product Tips
Looking for more tips for your Chalk Couture products? Here are a few more tips to help you get the most out of your Chalk Couture crafting products.